Tactics Engine reworked: Grid Generator
- Anthony Nguyen
- Aug 15, 2020
- 5 min read
So after working with less-than-ideal code architecture for my Tactics game I finally decided it would be a better idea to simply start over with a new project, migrating and fixing code simultaneously, rather than trying to implement new features and keep having to go back and fixing everything.
I also thought it would be a good idea to document my progress as I go along with this, so here goes.
Prerequisites
The first thing that comes to mind for a Tactics game is the game board, I will be using a 4-directional square tile-based grid for mine. A general level would look something like the following (from topdown perspective)
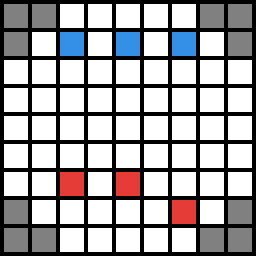
Blue tiles would be the Player's units, Red tiles would be the Enemy units, and grayed out tiles would be impasses or walls.
Grid Generator
Since I use Unity Engine as the base engine for my game, generating a grid on a map with 3D objects and colliders is relatively simple.
I first set up a Tile class which every tile on the map will use.

I divided a Tile's child components up to (currently) 3 categories: Graphics (handles all the rendering such as indicators or any visual effects visible to the player), Combat (handles all game logic related information ranging from Pathfinding to Damage calculations...), and Modifiers (unused for now).
For the Grid Generator, I simply have some values that determines the origin of the grid and its dimensions, some values used by Unity's built-in Raycast system to create tiles, and a GameObject that is the Tile prefab.
<CodeLanguage="CSharp">
public class GridGenerator : MonoBehaviour
{
    #region Properties
    Map map;

    [Header("Map Dimensions")]
    public Vector2 _mapOrigin;
    public Vector2 _mapMin;
    public Vector2 _mapMax;

    [Header("Settings")]
    float traceHeight = 10.0f;
    float rayDistance = 20.0f;

    RaycastHit hitInfo;
    public LayerMask ground;
    public LayerMask spawners;

    [Header("Prefabs")]
    public GameObject tileGO;

    [Header("Debug")]
    public bool DEBUG;
    #endregion
    ...
}
</Code>
For my GenerateGrid() method, I begin by creating an empty List of Tiles and finding the max and min points on the map.
<CodeLanguage="CSharp">
 public List<Tile> GenerateMap()
    {
        map = GetComponent<Map>();
        List<Tile> tiles = new List<Tile>();

        Point mapMin = new Point(Mathf.FloorToInt(_mapMin.x), Mathf.FloorToInt(_mapMin.y));
        Point mapMax = new Point(Mathf.FloorToInt(_mapMax.x), Mathf.FloorToInt(_mapMax.y));
           ...
    }
</Code>
Once I have the maximum and minimum points of the Map I simply iterate through the x and y's positions.
for (int i = mapMin.x; i <= mapMax.x; i++)
    for (int j = mapMin.y; j <= mapMax.y; j++)
I create a temporary Vector3 variable which stores the current location of our "cursor" and start raycasting from there.
Vector3 cursor = new Vector3(i, traceHeight, j);I only generate a tile if the raycast hits an object on a specific layer, which in this case is the Ground layer.
if (Physics.Raycast(cursor, -Vector3.up, out hitInfo, rayDistance, ground))
        {
                    // Instantiate Tiles
                    Tile t = CreateTile(hitInfo.point, new Point(i, j));
                    tiles.Add(t);
         }
I divided the Instantiation step into several smaller steps so it's easier to expand upon later on when more map-related features are implemented.
 Tile CreateTile(Vector3 hit, Point point)
    {
        Vector3 position = new Vector3(point.x, hit.y, point.y);
        // Instantiate tile
        Tile t = InstantiateTile(position);
        // Set tile information, etc
        t.Init(point);
        SetTileInfo(t);
        return t;
    }
The CreateTile method simply takes in the hit location and a point (on the grid) to determine the exact position of the tile in 3-D space and then instantiates a tile there, along with setting all the necessary infomation.

And just like that, we have ourselves a grid with tiles positioned to proper heights.
Observations
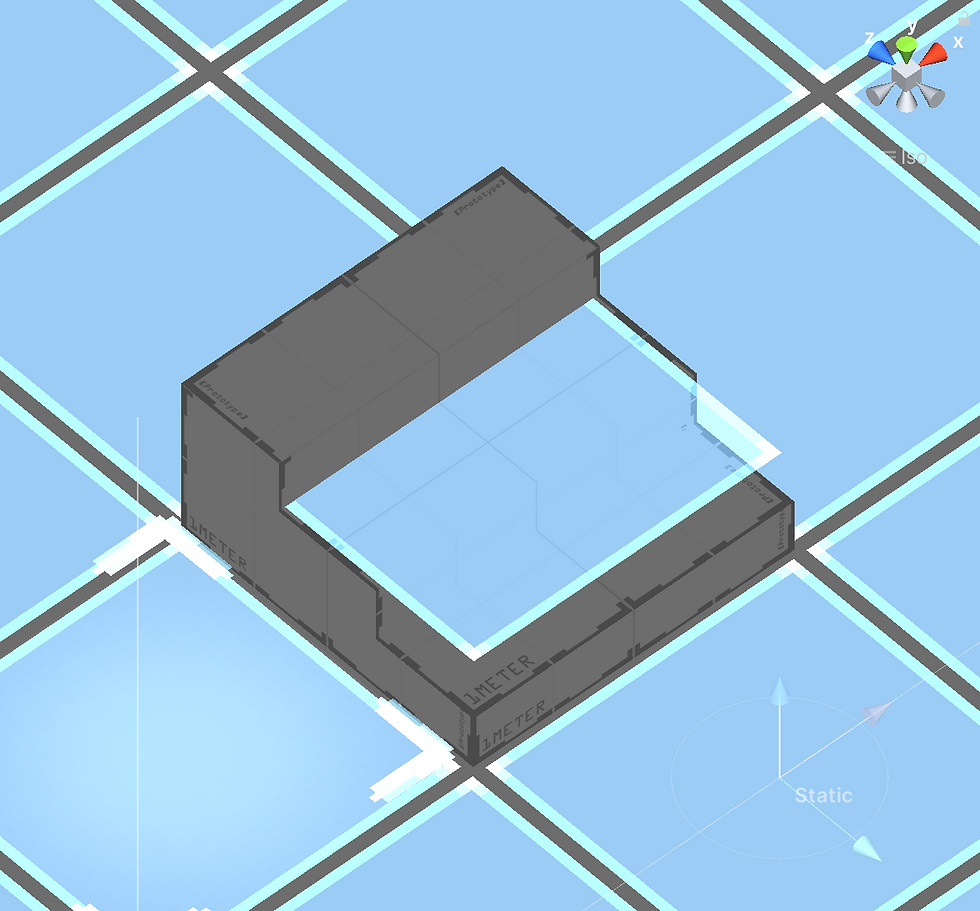
Now, what about a scenario where our maps are not completely made up from blocks. What if our maps had stairs, in which case the surface would be slanted diagonally, so if we placed a flat tile there, its highlights will be clipped into the mesh upon rendering. i.e.:
Now take this example from Fire Emblem Three Houses,
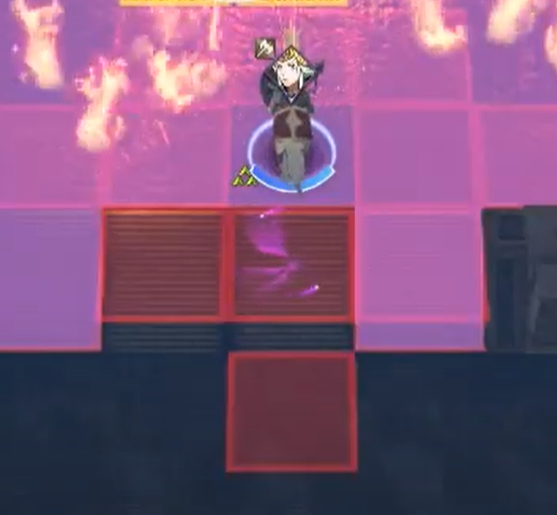
we can observe pretty clear that they have mapped their tiles properly across their objects' surfaces. So my question was, how would I go about achieving that same effect?
Raycast
Right now we're only casting a ray perpendicularly to an object's surface from a certain height and then instantiating a tile at the intersection.
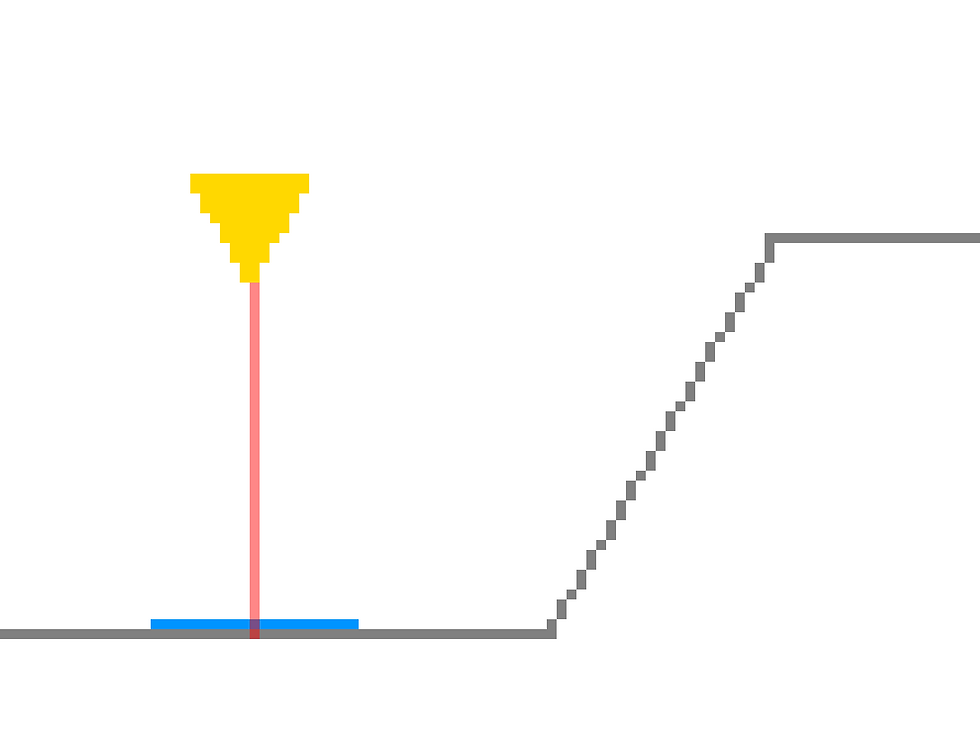
But if we do so at angle without doing anything to the created tile, we get this result:
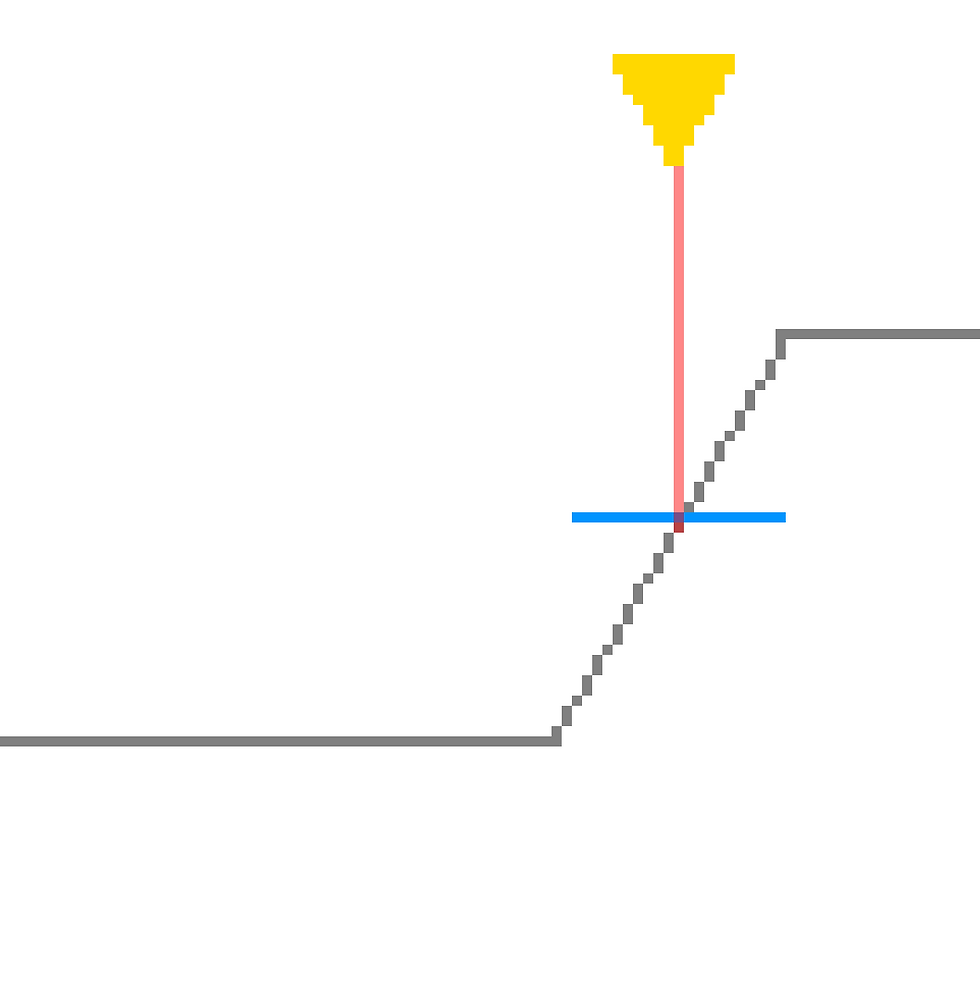
So in order to properly map the tile along the surface of the slope, we would need a bit of vector math and linear algebra.
The Math
RMy first thought about this was I simply want to rotate the tile upon creation in such a way that I would align with the surface of the object. The one convenient thing about Unity's raycast system is that there is this variable,
Raycast.normalwhich I can use to some vector transformation on the Tile object.
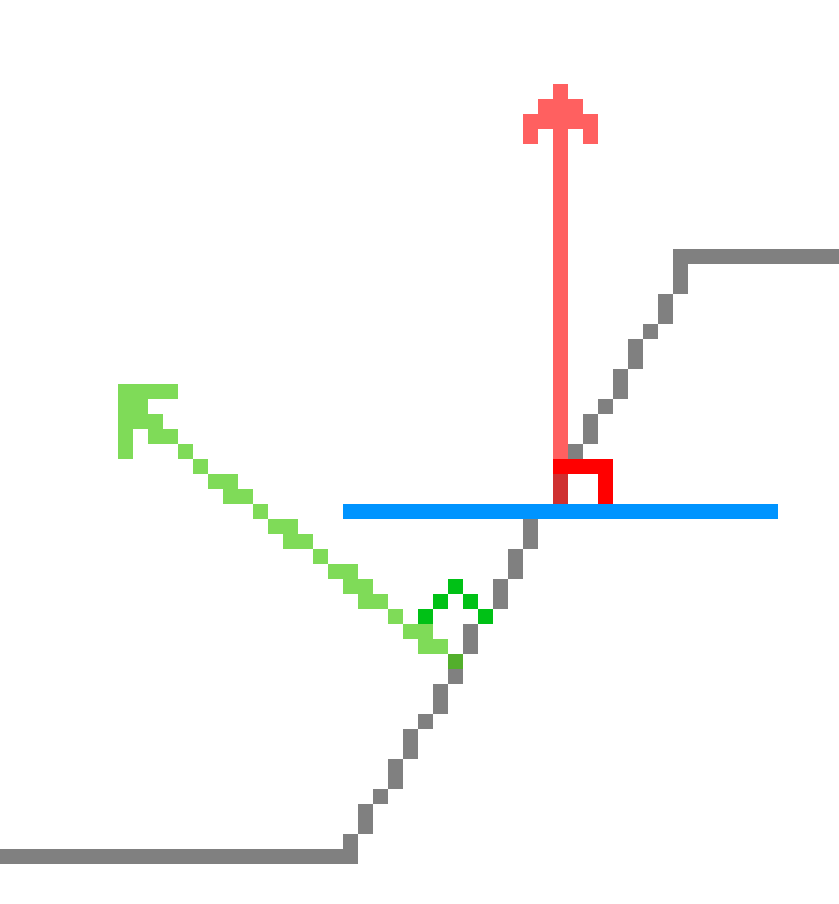
The red arrow is our tile's normal, the green arrow is our surface's normal, we want to align them exactly so that the tile is parallel to the surface. By default, our tile's normal is always pointing upwards, and so its normal is:
Vector3.upAnd we can get our surface normal by calling:
Vector3 hitNorm = hitInfo.normal;Once we have those 2 vectors, we can just rotate the tile's normal in such a way that it lines up with the surface normal and we're done right? Luckily, Unity also has a function we could use in order to achieve this:
t.transform.rotation = Quaternion.LookRotation(Vector3.up, hitInfo.normal);True, this would work on most flat slanted surfaces, but in the case of stairs, this won't cut it.
Since Physics.Raycast returns a very precise point of impact, we have one of these 2 following scenarios if we raycast on a stairs object:
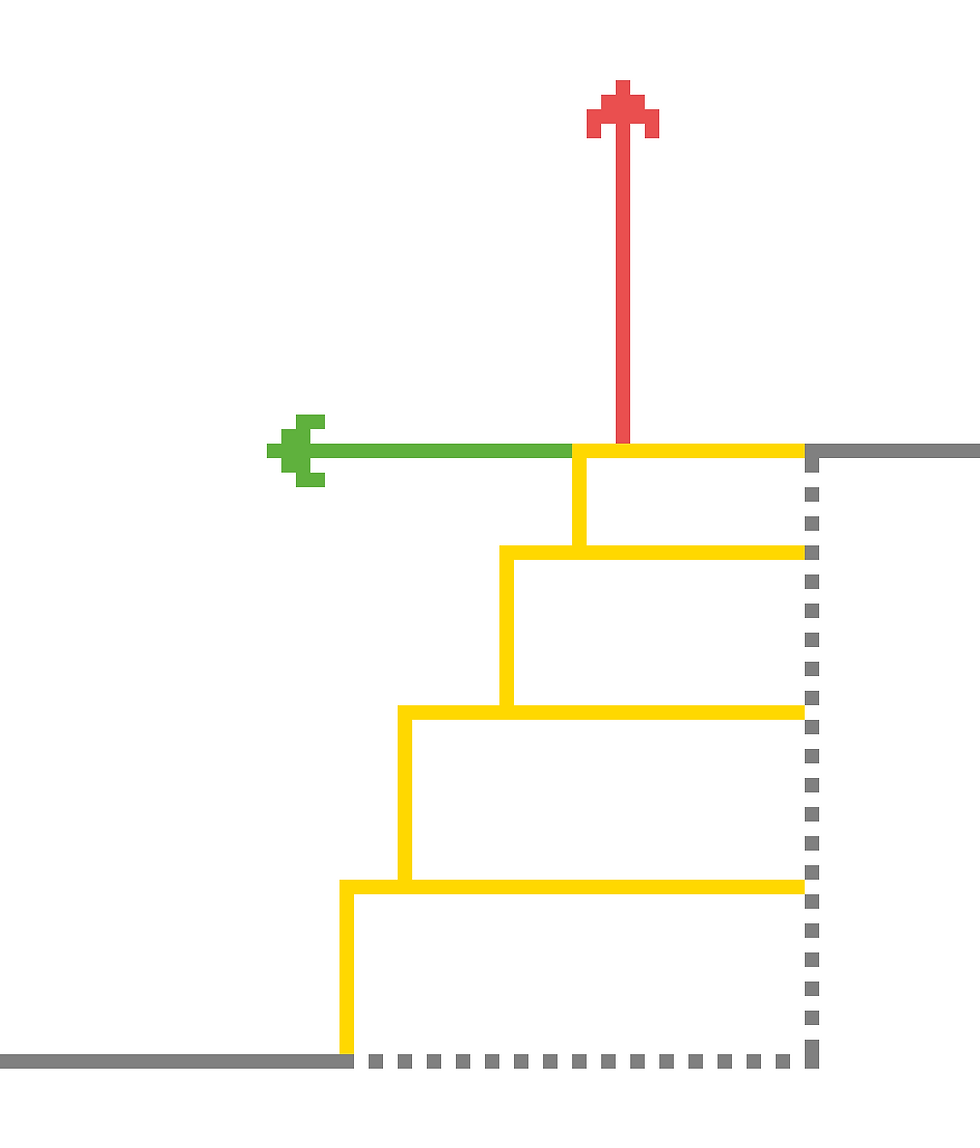
If our raycast hits a flat surface, it would simply return a Vector3.up as the normal (red arrow). If it happens to hit the edge of a stair, it would sometimes return a vector perpendicular to the red arrow, the normal of a stair's side face. Therefore, our tile would still be clipping through the stairs or it would be rotated -90 degrees on the X-axis if the ray happens to return the green arrow as the normal.
To solve this particular issue, we would need to calculate the exact normal vector of our hit surface and then line our tile's normal vector up with said vector. But in vector math, in order to find a normal of a plane, we need to do a cross product between two vectors that make up said plane.

blue = Vector3.Cross(red, green)Since each of my Tile is 1x1 scale on the X and the Z axes, I simply did 3 additional raycasts to find 3 corners of the actual square we are mapping our tile onto.
 Vector3 topLeft, topRight, botLeft;
        topLeft = topRight = botLeft = t.transform.position;

        float offset = 0.499f;
        // Raycast corners
        Vector3 cursor = new Vector3(t.transform.position.x - offset, traceHeight, t.transform.position.z + offset);
        if (Physics.Raycast(cursor, -Vector3.up, out cornersHit, rayDistance, ground))
        {
            topLeft = cornersHit.point;
        }

        cursor = new Vector3(t.transform.position.x + offset, traceHeight, t.transform.position.z + offset);
        if (Physics.Raycast(cursor, -Vector3.up, out cornersHit, rayDistance, ground))
        {
            topRight = cornersHit.point;
        }

        cursor = new Vector3(t.transform.position.x - offset, traceHeight, t.transform.position.z - offset);
        if (Physics.Raycast(cursor, -Vector3.up, out cornersHit, rayDistance, ground))
        {
            botLeft = cornersHit.point;
        }
I then used the positions of the three corners to find the 2 vectors that make up the plane:
 // Calculate surface normal
        Vector3 ab = topRight - topLeft;
        Vector3 ac = topLeft - botLeft;
Once I have that, cross them to get the true surface normal
Vector3 n = Vector3.Cross(ab, ac).normalized;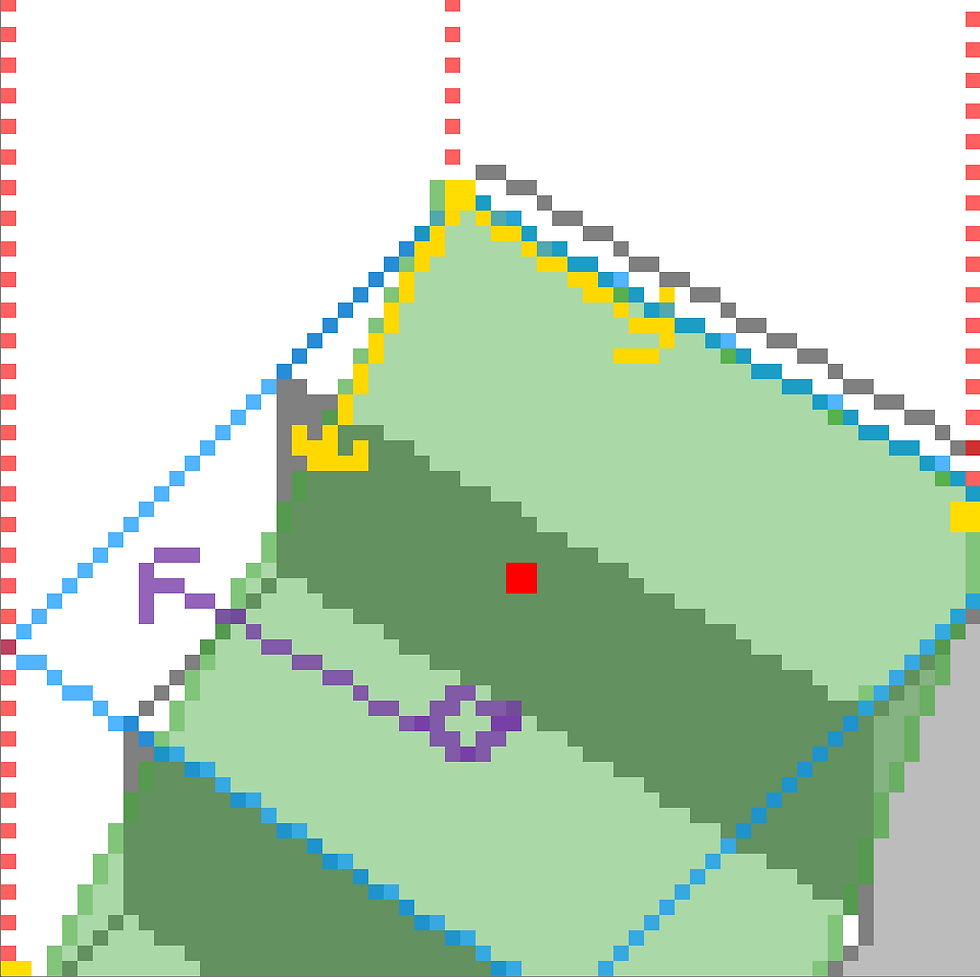
(green is the actual plane we are projecting our tile onto, purple is its surface normal, the yellow arrows are its forward and right vectors)
Since our object is never guaranteed to face forward (i.e.: a stairs object is rotated), we must account for those scenarios as well.
Vector3 right = hitInfo.transform.right;With the object's right vector and the projected plane normal, we then can determine the final direction that our tile's normal must align with in order to map correctly:
Vector3 look = Vector3.Cross(n, right).normalized;And with this, our tile would be placed properly
 t.transform.rotation = Quaternion.LookRotation(look, hitInfo.normal);
 // Slope height padding
 t.transform.position += new Vector3(0, 0.05f, 0);
            return;
I added an extra bit of height padding as an aesthetic preference.
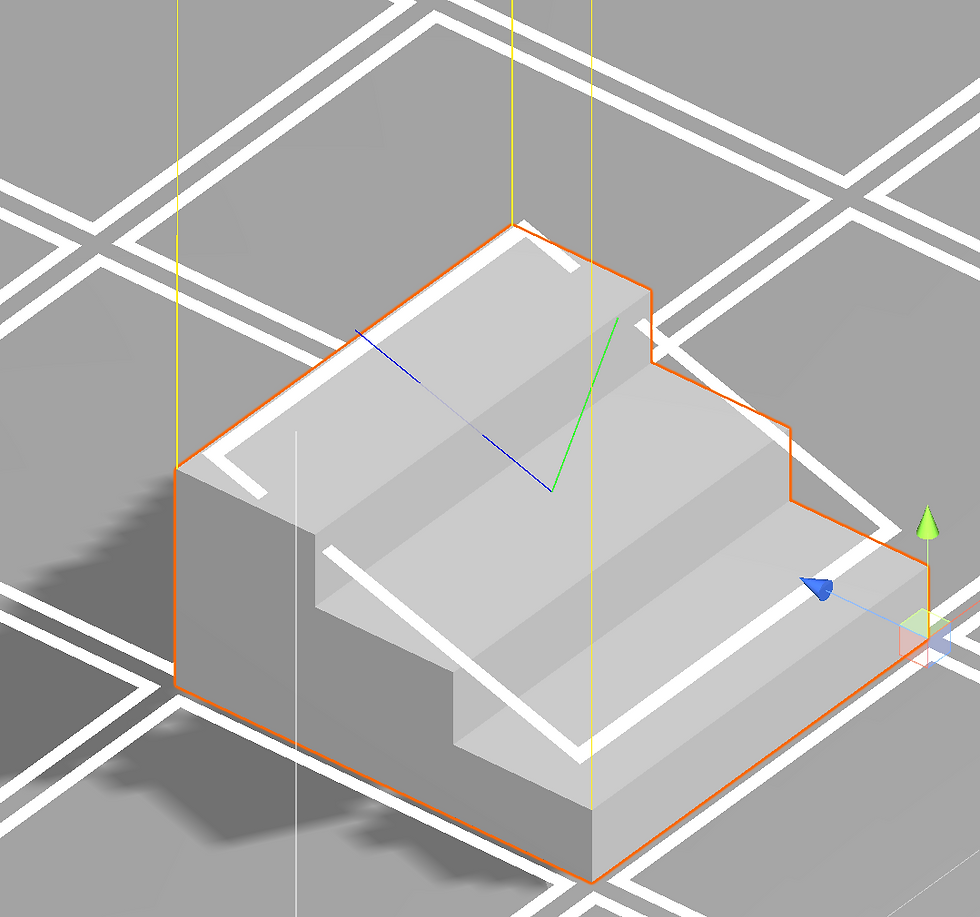
End result in Inspector mode, the blue line indicates the tile's forward vector, the green indicates its normal, the yellow lines are the corners of the plane.
And that's it!
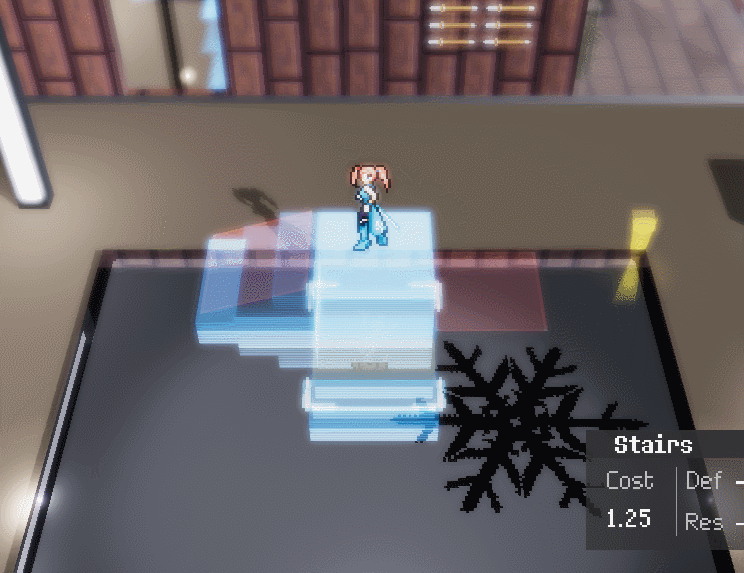
Here is a small preview of what it looks like in game.

Comments